ABOUT
FEEDSCONTACT
EMAIL DIGESTCANDY RATINGSTYPE
BRAND
COUNTRY
ARCHIVES
|
HighlightMonday, October 8, 2012
Hershey’s Chocolate World - CreateYour Own Chocolate Bar
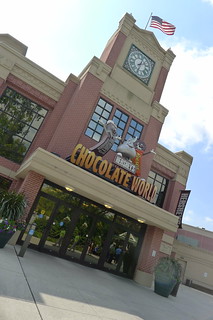
One of the new attractions at Chocolate World is Create Your Own Candy Bar. It’s a real, mini candy factory where you can customize a single, large candy bar from an array of options. It’s $14.95, so it’s not cheap, but it is an engaging way to spend 30 to 45 minutes, especially if you love to watch machines. When buying the ticket, you’re asked for your first and last name plus your zip code. I didn’t realize that this was how the bar was customized as you go through the factory experience (though you’re only addressed by your first name and last initial, in case you’re visiting with your AA group). If I knew this, I could have given my name as CandyBlog as you’ll see later. The tickets are for sale in the main lobby, patrons are given a ticket with a scheduled start time. Folks line up and are given hair nets and aprons, asked to remove all visible jewelry (rings and watches) and hopefully washed their hands. (You don’t actually come into contact with any of the equipment or ingredients.) I don’t know what the limit for a group is, but I would guess about 15-18 people.
The event starts with a quick video which shows you how each stage of the process will work. The basic steps are: choosing your formula, the production of the bar, the cooling of the bar, creating a custom wrapper and then the boxing of the bar.
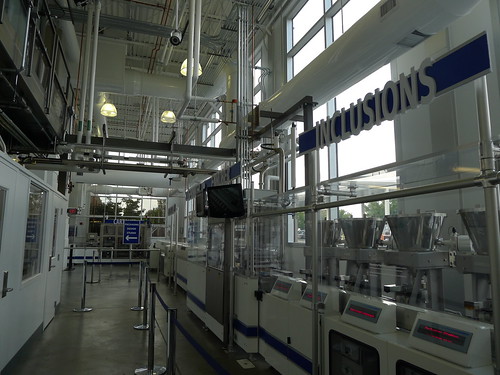
The customizations are: You simply scan your ticket’s bar code at the screen and make your selections. Through a set of swinging doors, the set up is a real mini factory line with a continuous conveyer through a series of stainless steel machines. It extends along a long exterior wall, so it’s well lit and you can view it from the outside (though a real candy factory wouldn’t allow so much sunlight directly on the process). You can follow along and witness every step of the manufacture. Everything is well within view just behind a plexiglass divider and well marked with what’s going on at each step.
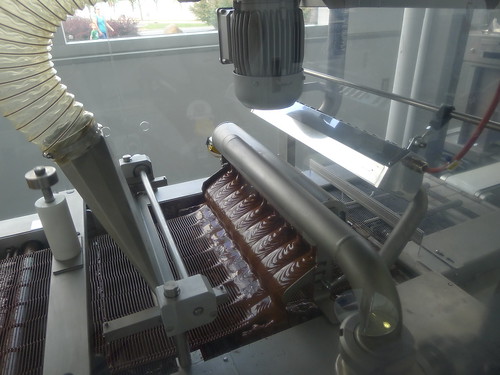
The process starts with a chocolate base. It’s like a little, short walled box of a bar. I chose dark chocolate and the suction arms picked one up and dropped it onto the conveyer to start. Along the conveyer are the six possible inclusions, when the bar arrived at an inclusion for your bar, the hopper or screw feeder opens up and drops in your items. At each station, the items are marked and a little bit about the reasons for the type of dispensing is explained. Screw feeders work well for items that might be sticky, like toffee bits and gravity feeders are for dry items like nuts and pretzels. Once my inclusions, pretzel bits, almonds and butter toffee bits, were inside the little chocolate box, the bar proceeded towards the enrober. All bars were coated in milk chocolate. No choice. My bar, though, was filled unevenly. The corners had nothing in them and the center had a too-high mound. I would have preferred that my bar go over some sort of vibrating bar that would level things before the enrober. The enrober is a thick curtain of chocolate on an open mesh conveyer. The video above is short, but gives you an idea of the process. The chocolate that isn’t used gets filtered and recycled back into the system. (So do not eat these bars if you’re sensitive to gluten, tree nuts or peanuts, even if you didn’t pick those items.)
After enrobing, bars that get sprinkles will. I didn’t select those. Then the bars go into a cooling tunnel. The cooling process takes about 8 minutes, so it’s off to waste time in the design and marketing department. Just off the “factory floor” is a room with more touch screens. Waving the little bar code on my ticket got a new series of options. First, I could design my wrapper. (Well, it’s actually a sleeve, it’s not well explained before you get in there that the chocolate bar comes in a box, which is then inside a tin which gets a customized sleeve.) The design options are not extraordinary. You can choose your background as either a solid or gradient of color or a pattern. Then there are the added items - Hershey Logos, Your Name and some icons (mostly Autumnal and Halloween). I made what struck me as a pretty ugly design and pressed print.
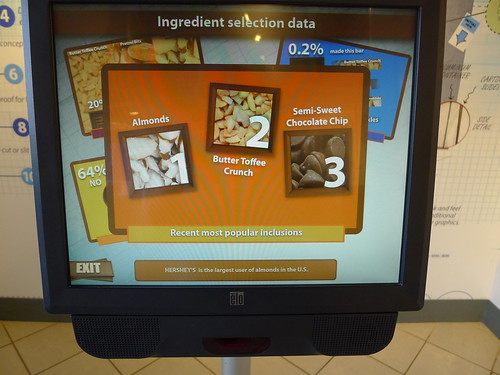
After that the screens give you marketing data about your candy bar. All sorts of different graphs that say how popular or common things are and what other people have done. That process took me about three minutes, and I tried to rush through it since there were only five screens and plenty of people (including some kids which probably wanted more time on the design). Then it was back to watching the cooling tunnel ... which is a tunnel and only had a few little windows to check on the progress of the bars.
Once the bars came out of the cooling tunnel they were loaded into little slots and dumped into boxes. The boxes got a little laser printing on the end with everyone’s name, then went down to the wrapping stations. This was the only part of the process that was hands-on with any of the factory workers. They had already printed our labels and were waiting for the bars to come out. They popped the bars into a tin, closed the tin and put on the sleeve wrapper.
It’s extremely clean, as you’d hope. It’s very well run and each person you meet on the Hershey’s staff is eager and seem knowledgeable. (Especially once you get in the factory room.) I was at the front of the line and ended up being the first bar (I already scoped what I wanted and was ready at the bar selection process). For me it was about 35 minutes, but if you’re slower or at the back of the line, this might be 45 minutes or more. So allow ample time, as well as the fact that once you get there and they issue the ticket, your start time may be more than a half an hour away.
The tin is 7.5” by 4.5” and 1.25” high with rounded corners. There’s a plastic tray inside that holds the boxed chocolate bar with the generic packaging.
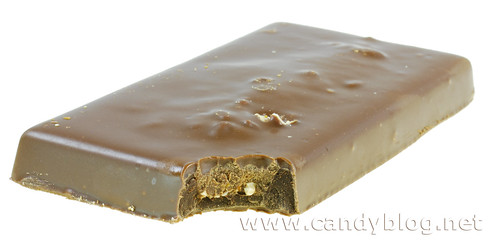
The bar is pretty big. It’s 5 inches long and 2.75 inches wide and maybe 2/3 of an inch high. I don’t have an approximate weight on it, but it’s well over 6 ounces. As I noted from the production line while watching it being made, the base is dark chocolate and though the chocolate tray had room, the inclusions didn’t make it into the corners. So it takes a while of biting to get to the interesting part of the bar.
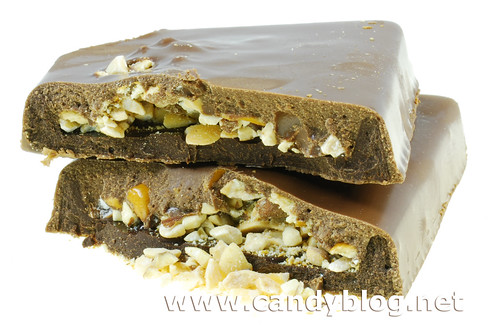
I broke my bar open and just as I suspected, the contents spilled out. What’s more, I felt like I was missing the actual inclusiveness ... then enrobing didn’t actually cover my center. So I had my filling adjacent to chocolate, but not actually covered.
Aside from the physical mess, I didn’t like the taste. The fillings were dry and even though it was only a week later that I ate it, it was stale. The pretzel pieces weren’t crisp and were really small so had less crunch to them and were more of a grainy texture. The almonds were nice, small pieces but still fresh and crunchy. But what I was really disappointed about was the butter toffee bits. I was hoping for little Heath toffee chips. Instead I got some sort of artificial butter flavored thing that just stunk up the bar. Though I chose a dark chocolate base, the majority of the chocolate in the bar is still the milk chocolate. It’s rich and sweet, but does have that Hershey’s tang to it. (Some don’t like it, but if you don’t ... why are you at Hershey’s Chocolate World?) The dark chocolate notes came in a bit, especially when I was eating the sides, but really didn’t nothing in the middle. On the whole, I give myself 5 out of 10. I blame my inexperience and ingredients.
The problem with my fillings is that they’re dry. What I would suggest is either squirting a little chocolate in the base first and then putting the inclusions into it, or putting layers of chocolate into the center between the dispensing of the inclusions. Then do a little jiggling to get it all evened out and get the air out. This solves two problems. The other thing I might suggest is that the “candy makers” get to try the inclusions first. There should be a little tasting table, maybe after you’ve bought your ticket before you get the “orientation” portion. That way we can really get a sense of what we’re putting in there instead of $15 experiments. The other thing I’d like to see is the ability to go through the process just accompanying someone who bought a ticket. I can see this being a huge expense for a family with many kids. It would be nice if the parents weren’t obligated to also get a ticket and bar.
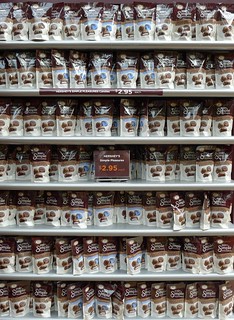
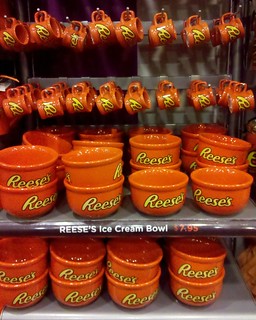
The stores there carry a huge array of branded merchandise and candy. The candy selection, though there’s a great quantity, isn’t really that diverse. For Hershey’s Dagoba and Scharffen Berger line they carry only three or four items. The prices are about what you’d pay at the drug store or grocery store when the items aren’t on sale, which is too bad. I heard more than one person lamenting that they could do better and not have to haul the stuff home if they just stop by Target or Costco. So I’d suggest focusing on the hats, tee shirts, playing cards, keychains and mugs. What I would want from a “factory store” is a section where you can get special preview items, items out of season and of course super discounts on factory seconds. Something that I couldn’t get anywhere else. I’d also want better prices, after all, you’re buying direct so if there are no middle men, why are the prices so high? The only item I saw that rose to that level of specialness were green & red Hershey-ets.
Free parking, free admission. Fees for most special activities. Wheelchair accessible. Their hours vary wildly, so call or check their website. Open every day (except Christmas). More photos from PennLive of the Create Your Own Chocolate Bar. Hershey’s Chocolate World gets a 7 out of 10 from me as an adult, I think kids would rank it higher. My ticket for this experience was comped by Hershey’s. I have not done any of the other classes or movies at Chocolate World, only the free ride and shopped at the stores. Related Candies
POSTED BY Cybele AT 1:08 pm Hershey's • Chocolate • Cookie • Nuts • Toffee • 5-Pleasant • 7-Worth It • Highlight • Shopping • Friday, August 17, 2012
Candy Tease: August 2012Here are some new confections that are coming in the future or may have already hit stores near you.
POSTED BY Cybele AT 1:46 pm Candy • New Product Announcement • Highlight • Featured News • Thursday, August 2, 2012
This Week in Candy Blog History: August Week 1I’m still on a lighter schedule here at Candy Blog central. But here are a few posts that you may have missed over the years in previous Augusts.
2011
Unfortunately the Russell Stover version just doesn’t measure up, but that shouldn’t stop you from giving them a try, especially if you’ve been looking for a milk chocolate version or a non-holiday fix on their novelty items. Name: Marshmallow & Caramel in Fine Milk Chocolate Read the full and original review of Russell Stover Marshmallow Caramel. 2010
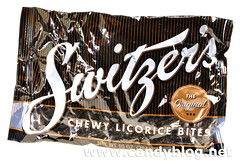
It didn’t quite live up to my hopes, though I don’t recall being a huge fan of the flavor profile if I had it as a kid. Name: Chewy Licorice Bits Read the full and original review of Switzer’s Licorice. 2009
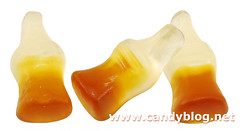
Name: Happy Cola Gummi Candy Read the full and original review of Haribo Happy Cola Gummis. 2008
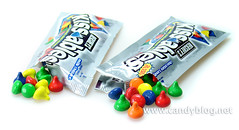
The issue and change brought national attention to Hershey’s and shortly after this Kissables disappeared from shelves (though I do see them at the discounters from time to time). Name: Kissables (2008 formula) Read the full and original review of the Old & New Hershey’s Kissables. 2007
Name: Raffaello & Rondnoir Read the full and original review of Ferrero Raffaello & Rondnoir. 2006
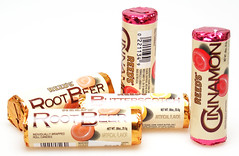
Name: Reed’s Cinnamon, Butterscotch & Root Beer Read the farewell post for Reed’s Candy Rolls. 2005
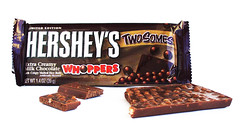
Name: Twosomes - Whoppers Read the full and original review of the Hershey’s Whoppers Twosomes Bar. POSTED BY Cybele AT 4:58 pm Candy • CANDY BLOG • Highlight • Featured News • Wednesday, June 27, 2012
This Week in Candy Blog History: June Week 4
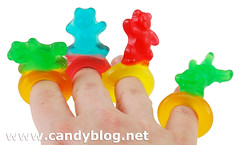
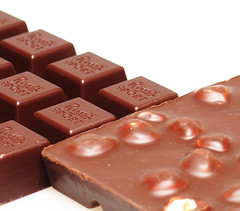
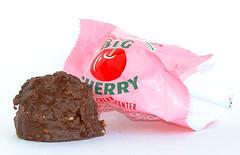
For this week’s installment of archival reviews, there’s definitely a summer theme going on. Less chocolate, more fruity chewy things. 2011 Name: Gummi Bear Rings Read the original review of Trolli Gummi Bear Rings. 2010 Name: 3-Dees Natural Fruit Snacks Read the original review of 3-Dees Natural Fruit Snacks. 2009 Name: Puckerooms Read the original review of Wonka Puckerooms Gummies. 2008 Name: Now and Later & Soft Now and Later Read the original review of Now & Later and Soft Now & Later. 2007 Name: Disneyland Chocolates Read the original review of Disneyland’s Candy Palace Chocolates. 2006 Name: Feinherb, Dark Chocolate with Whole Hazelnuts & Fine Extra Dark Chocolate Read the original review of Ritter Sport Dark Bars. 2005 Name: Big Cherry Read the original review of Christopher’s Big Cherry. POSTED BY Cybele AT 2:44 pm Candy • Highlight • Featured News • Tuesday, June 19, 2012
Treat Trip: Bevan’s Own Make Candy - Peanut Butter Sticks & Molasses Chips
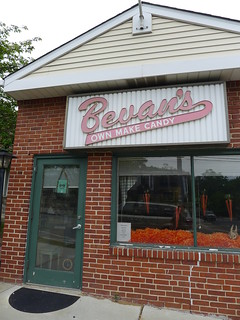
After my niece’s lacrosse game but before my nephew’s baseball game we headed over to Bevan’s Own Make Candy in Media, Pennsylvania, not far from Philadelphia. It’s a cute little shop where nearly everything they sell is made right there in the store. The Bevan’s shop has been there for over 50 years, churning out local favorites and holiday treats. I was interested in the items that they were particularly well known for. The store looks barely touched by the years. The interior is a simple set of shelves, a quaint window display and a large glass candy case. The gal behind the counter was happy to answer questions and even ended up checking in back for a dark chocolate mix for me.
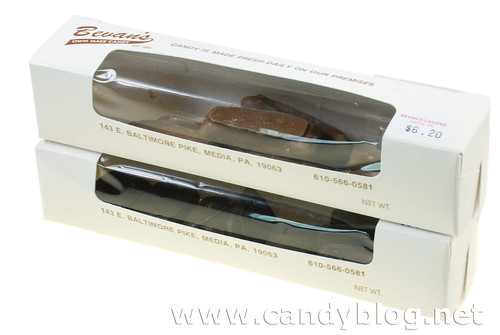
We picked up three boxes of candy, one to eat with the family and two which I shared and then took the rest home with me. We picked out Milk Chocolate Covered Pretzels (which were gone within 24 hours), Peanut Butter Sticks and Molasses Chips. Each box was between $6.00 and $6.50 and I think had about a half a pound in it.
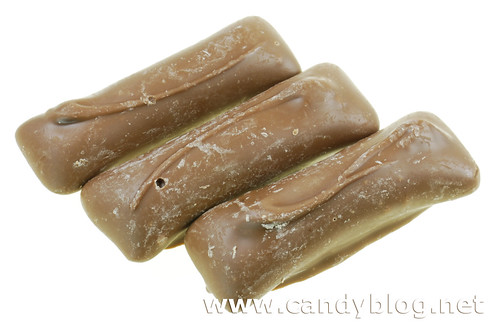
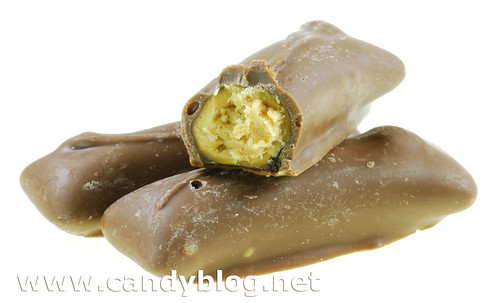
I love the idea of a Butterfinger, but have been disappointed over the years with the quality of the Nestle product. But stores like Bevan’s almost always have a house made version, Peanut Butter Sticks and they’re far superior. This version is a straw-style peanut butter crunch that’s then covered in a large helping of milk chocolate.
The peanut butter crisp is flaky and melts in the mouth quickly. The peanut butter flavors are strong and it’s not too sweet with just the right, light touch of salt. The milk chocolate is smooth, a little too sweet for me, but the right ratio for this version of the candy. It was hard to keep at least half a box for photographing when I got home.
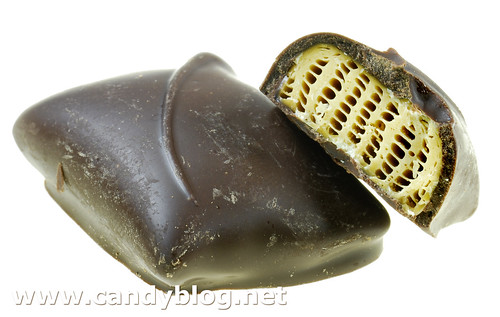
The other item I love getting, especially from Pennsylvania candy makers, is Molasses Chips. Like the Peanut Butter Sticks, it’s a candy that takes a bit of work and skill to make, even though the recipe is quite simple. The center is just a boiled sugar and molasses mixture that’s pulled and folded to create the unique layered texture. Then it’s cut up and covered in dark chocolate. The bitterness of the mild dark chocolate goes well with the dark, toffee sweetness of the molasses. Crispy, melt in your mouth, definitely a keeper. If you’re in the area and crave a little home-cooked flavor, it’s a good shop to experience. Around the corner on Edgemont Street is the actual candy kitchen, you can look in through the window and see their equipment and candy making tables. Bevan’s Own Make Candy Read more about Bevan’s at the local Media, PA website, Fig Media. POSTED BY Cybele AT 2:50 pm Candy • Chocolate • Hard Candy & Lollipops • Peanuts • United States • Highlight • Shopping • Wednesday, June 13, 2012
This Week in Candy Blog History: June Week 2
Here’s another set of links to tasty (and maybe not so tasty) items in the archives from this week in history. Overall, it looks like my trend in June is to visit classics, with a few twists. 2011 Last summer I got to try a new line of lower calorie treats. In reality what Nestle created were just small treats for the same price as a larger portion treat for the same price. Good job. (Still, they would be truly delicious with actual chocolate.)
Read the full review of Nestle’s Skinny Cow Heavenly Crisp from the archives. 2010 Some candies are just too pretty to eat. Some of Haribos fit right in there. Since my trips to Germany, I’m actually pretty happy with the selections that we do get in the United States. Most of it is good and fits the flavor profiles Americans prefer.
Read the review of Haribo Raspberries from the archives. 2009 Some classic candies just can’t be improved upon. These don’t need to be covered in chocolate, they don’t need to be made by hand. (Though a little less artificial coloring wouldn’t hurt.)
Read the review of Spearmint Leaves from the archives. 2008 This is one of those candies I hadn’t tried before starting the blog. Since posting this I’ve actually bought a couple of full boxes of Coconut Longboys and enjoy them quite a bit, especially in the summer since they’re creamy but have no chocolate and stand up well to the heat.
Read the Coconut Longboys review from the archives. 2007 When I wrote this review I fully intended to try other versions of Circus Peanuts and compare them, perhaps do a full photo array. But I can’t bring myself to buy them again, let alone open the package and possibly eat them.
Read the Circus Peanuts review from the archives. 2006 This is one of the best Limited Edition Snickers that came along, I believe it’s been re-issued twice. It seems odd that they made the 3X Snickers (chocolate caramel, chocolate nougat and chocolate coating) a regular item but not this one.
Read the review of Snickers Xtreme from the archives. 2005
Read the review of Nestle Aero from the archives. POSTED BY Cybele AT 3:25 pm Candy • Highlight • Featured News • Friday, June 8, 2012
Eat with your Eyes: Good and Plenty
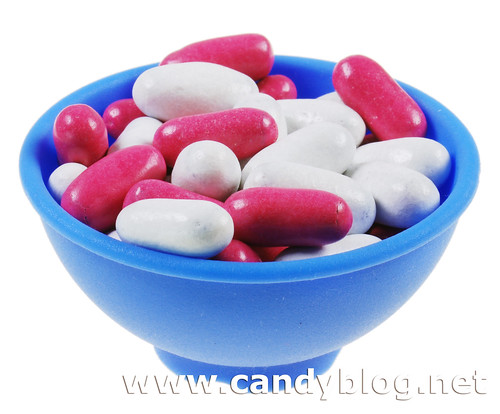
There’s pretty long list of candy that does well in the summer’s heat. Panned candies, those with a sugar shell, do particularly well. So for those who want a little licorice treat, I still like Good & Plenty. It’s not chocolate, but it has plenty of hearty and deep flavors because of the molasses base. One of my other favorite all-weather candies is Chick-o-Sticks. What’s your favorite summertime candy? POSTED BY Cybele AT 10:38 am Candy • Highlight • Photography • Wednesday, June 6, 2012
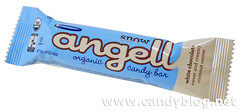
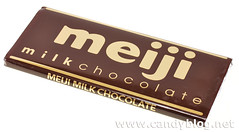
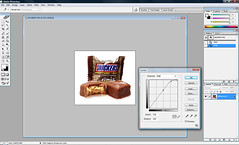
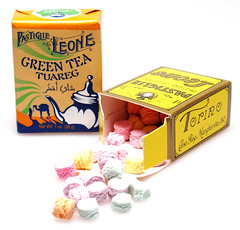
This Week in Candy Blog History: June Week 1I started Candy Blog over seven years ago and have probably documented about 2,500 products here in one form or another. It used to be that I could actually remember what I’d tried and reviewed, but the database has become so huge that sometimes I actually find myself searching my own website while at the store to see not only whether I’d tried something but what I thought of it. So I thought once a week, I’d dive into the archives and present a highlight from each week on this date since Candy Blog’s inception in 2006. June 2011 Read entire review of Snow Angell Organic Candy Bar. June 2010 Read entire review of Meiji Milk Chocolate. June 2009 Read entire review of JAVAZ Milk & Dark. June 2008 Just a note, at the time I was using a Sony DSC-V3 camera to shoot. After about 40,000 shots on that camera, I finally upgraded to a Nikon D-60 and use a Tamron Macro Lens. The rest of the process is the same though. June 2007 Read entire review of Tiny Size Chiclets. June 2006 Read entire review of Pastiglie Leone - Mixed Flavors & Green Tea. June 2005 Read entire review of Trader Joe’s Chocolate Sunflower Seed Drops. POSTED BY Cybele AT 12:52 pm Candy • Highlight • Featured News • 
|
Meticulously photographed and documented reviews of candy from around the world. And the occasional other sweet adventures. Open your mouth, expand your mind.
  SEARCHSearch the Candy Blog archives

    
FEATURED NEWS ITEMS
COPYRIGHT NOTICEAll content (text and photos unless otherwise credited) is copyright 2005-2026 by Cybele May Please do not use my photos without prior permission directly from me, they represent what I ate in preparation for these reviews and are not to be used for other purposes. Design by Hop Studios
|
|||


 SUPERB
 YUMMY
YUMMY  TASTY
TASTY  WORTH IT
  TEMPTING
  PLEASANT
  BENIGN
  UNAPPEALING
  APPALLING
  INEDIBLE




 Name: Milky Way French Vanilla and Caramel Bar
 Name: Twix Sugar Cookie Minis
 Name: Toblerone Crunchy Salted Almond
 Name: Perugina Baci White
 Name: Warheads Sour Coolers
 Name: Smarties Taffy
 Name: Tic Tac Fruit Adventure
 Name: Astro Pops

 The Ferrero Rocher line got a new variety in 2007 with the Rondnoir, a dark chocolate version of the crunchy hazelnut paste chocolate. It was also an opportunity for me to review everything Ferrero had on American shelves at the time.